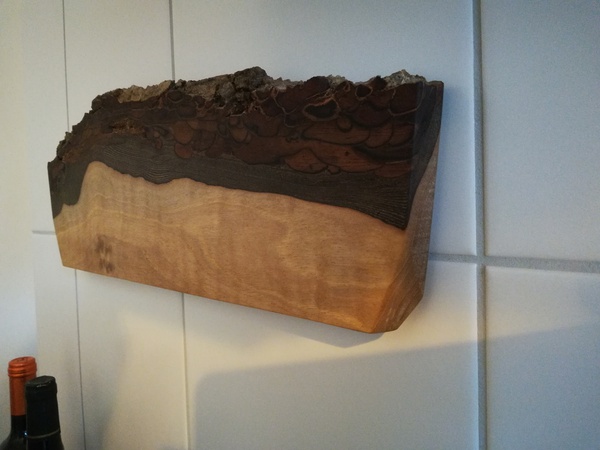
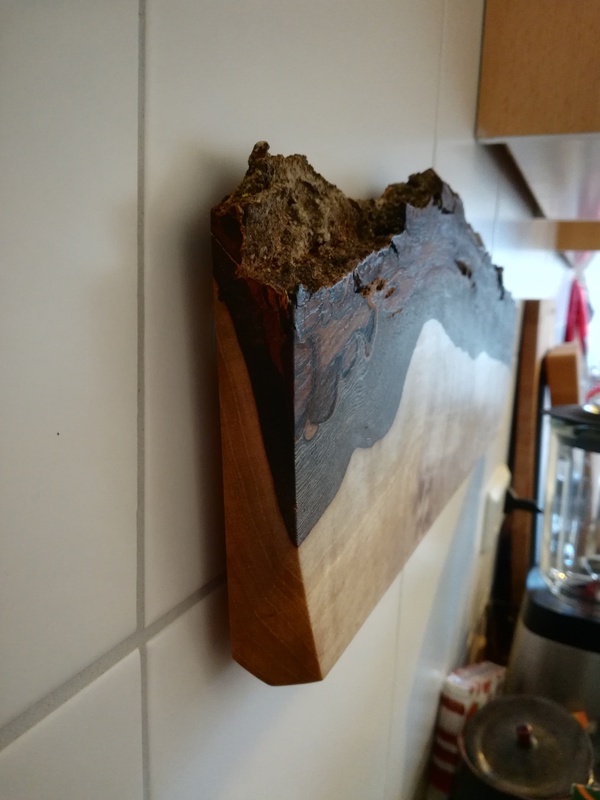
Our customer wanted an original piece in his kitchen and built this unique knife block out of walnut wood.
Knife blocks differ greatly in design, shape and texture, including this model here.
I used the following materials for my Knife block made of walnut wood:
- 1 piece of walnut wood with bark
- 4 x Neodymium bar 100 x 13 x 5 mm with hole and countersink – 30 kg
- 11 x Discmagnet Ø 15.0 x 15.0 mm N45 nickel – holds 14.4 kg
- 5 x Metal disc Ø 30 galvanized with double-sided adhesive tape
- 1 x 5 minutes epoxy adhesive fast curing 2-component adhesive
- 1 x Mixing nozzle for epoxy adhesive (EPK-25) with bayonet
I worked with the following tools:
- Cordless screwdriver
- Sandpaper
- Forstner drill bits 16 mm and 20 mm
- Multifunctional tool with milling head and router attachment
- Chisel
- Japanese saw
Knife block made of walnut wood
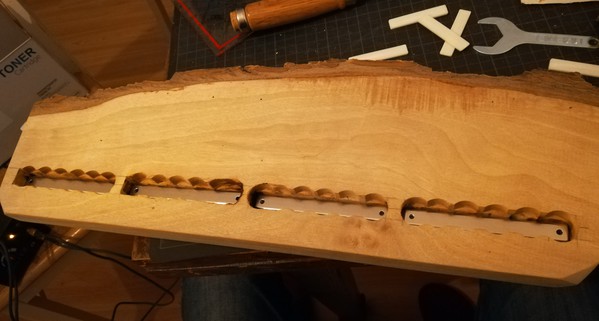
- First I prepared the wood: sawn, sanded and treated with linseed oil varnish.
- With the 20 mm Forstner drill, I pre-drilled the compartments for the flat strips and milled them down to 3 mm remaining thickness with the milling machine.
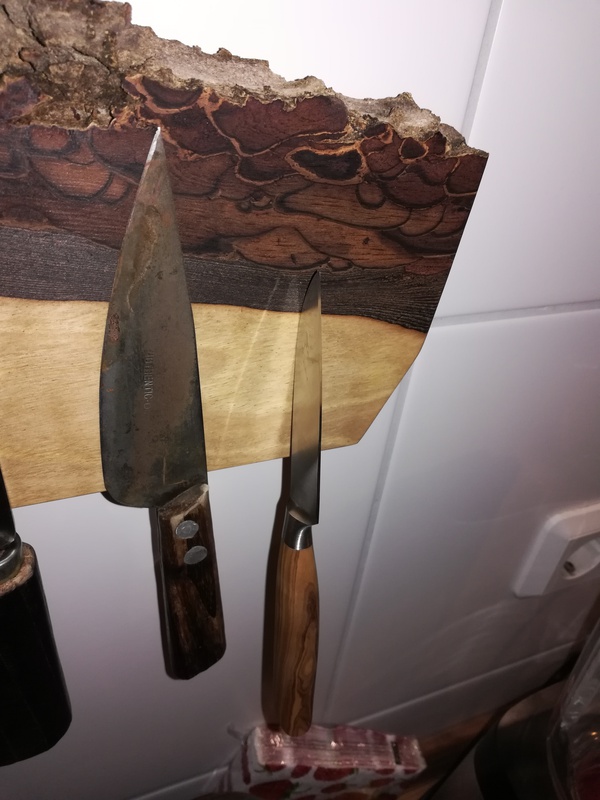
Since it was too tricky for me to break through to the surface due to the 2-3mm long centering mandrel of the Forstner drill, I decided on the option with the milling cutter. Alternatively, you could perhaps grind the centering mandrel. - After I tried to use the flat strips, I noticed that small knives were being held, but the larger knives slipped through the heavier handles.
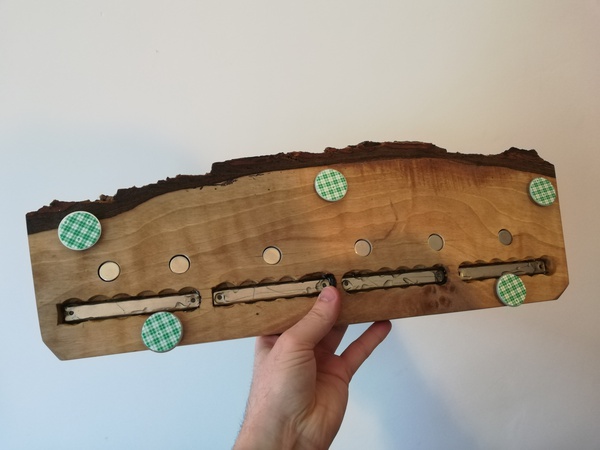
Even medium-sized knives „slipped“ a little and had difficulties staying vertically (depending on where the handle was centered). - So I decided to give each knife a disc magnet above the flat bar. To do this, I drilled for the disc magnet Ø 15.0 x 15.0 mm N45 nickel – holds 14.4 kg with a 16 mm Forstner drill up to 3 mm remaining thickness (that worked because the smaller drill had a shorter centering mandrel).

Tips:
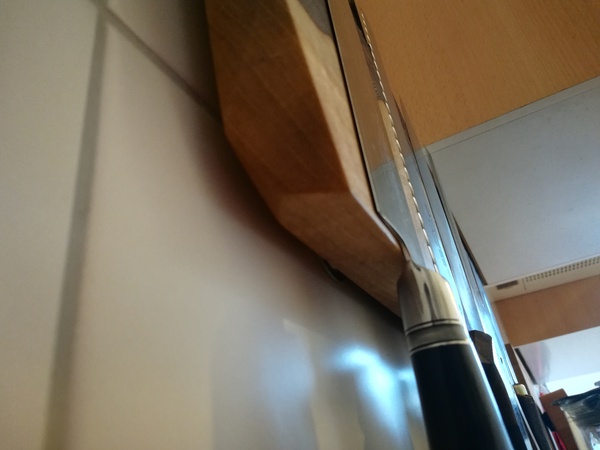
- In order to be able to attach the knife holder to the wall without a base, I embedded 5 magnets, each 1cm deep, into the wood, so that a protrusion of 5 mm was created.
This made it possible to achieve a nice „floating“ effect and the whole thing stood out a little from the wall.
Wood screws were not necessary. Because I used the epoxy resin adhesive to glue the magnets in, as this is better suited for magnets than ordinary glue.
Suitable for visually demanding bonds. It bonds a variety of materials, such as metal, ferrite, marble, ceramics, stone, wood, concrete and plastic. - It is essential to ensure that all magnets are glued at the same time, as the glue in the mixing nozzle hardens quickly (after 5 minutes it is too firm).
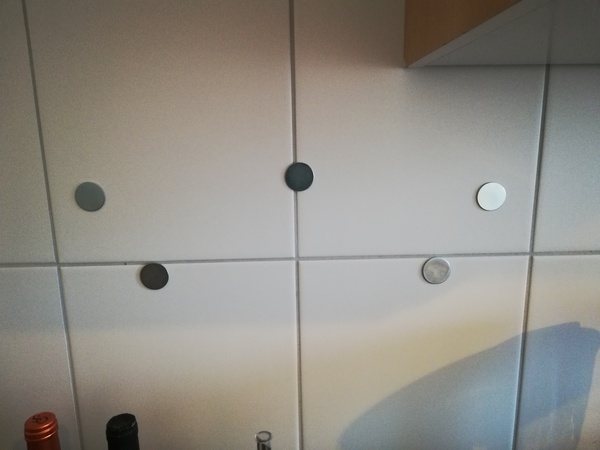
Attachment of the knife block:
- To attach the knife block to the tiles, I placed the self-adhesive metal disks on the fastening magnets and cleaned the wall clean, grease-free and dry.
Conveniently, the tile joint was perfectly horizontal and so you could align the knife holder with it. The foils were peeled off all adhesive surfaces and the knife holder together with the metal disks were pressed against the wall. - Then this was pushed to the side to loosen the holding magnets.
I pressed the metal discs firmly on again. - The 3 cm metal disks provided enough adhesive surface.
This enabled me to make small corrections to the position of the block afterwards. - At the lower edge of the wood, I made sure that the metal discs did not protrude.
The advantage is that the holding magnets do not have to sit in the middle of the metal discs in order to have a good hold.
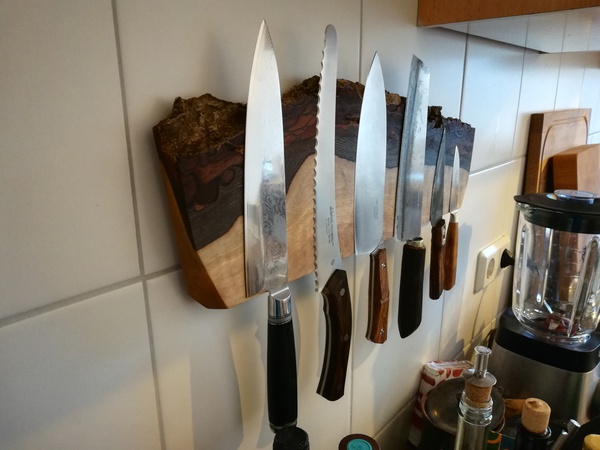

This DIY knife block is truly a unique idea. A great eye catcher!
In summary, I can say that fewer holding magnets of this caliber would have been sufficient.
If the cordless screwdriver is used, please note the required depth and that you only drill vertically.
A drill press would most likely simplify this process.
The magnets adhere perfectly.
Nothing wobbles and it is really tight!
An alternative would have been to use only the 15 x 15mm disc magnets without the additional use of the flat bars.
A small knife is reliably held on the back of the knife.
The variant with the flat strips was the better decision for me. The knives can be repositioned at any time.
Even smaller vegetable or office knives can simply be clamped in between.