Today we introduce you to a unique and very original magnet application. Our customer and his friends meet regularly to maintain analog games. His idea was to build a table-top game table with the help of our products.
Table-top game table
1. Remark
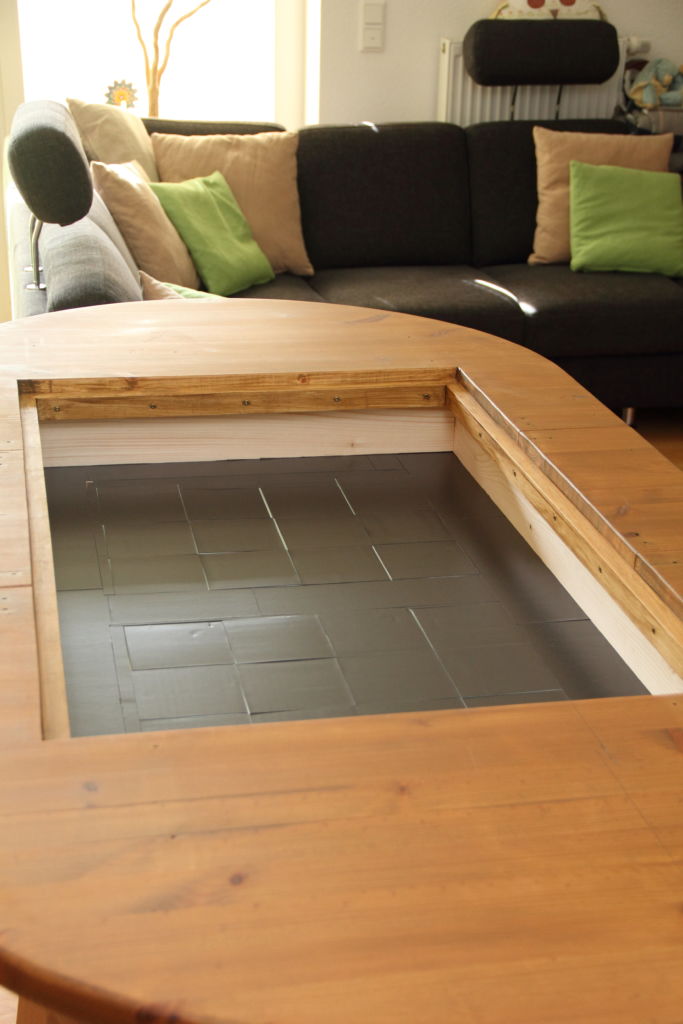
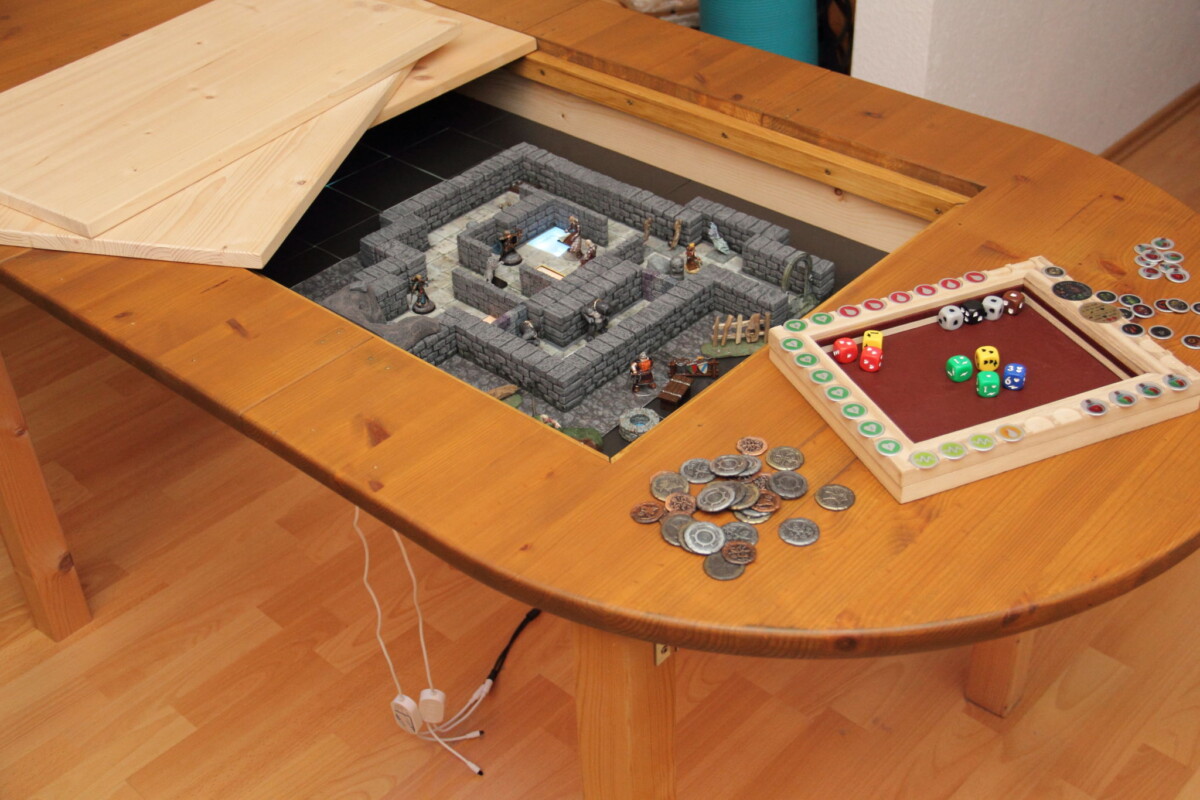
As you can see in the pictures, the table is still in the construction phase.
2. Background
About three years ago I joined four other people to form a regional group that meets regularly every four to six weeks to maintain analogue gaming. In particular, the Fantasy TableTop „The Descent – Journey into the Darkness – 2nd Edition“ is on our agenda. In this course, four of the five of us compete as one hero of a hero group each, who roam dungeons (walls, caves, plains) to save the world from evil, which manifests itself in the form of monsters, the fifth from our group be played – the overlord.
3. Motivation
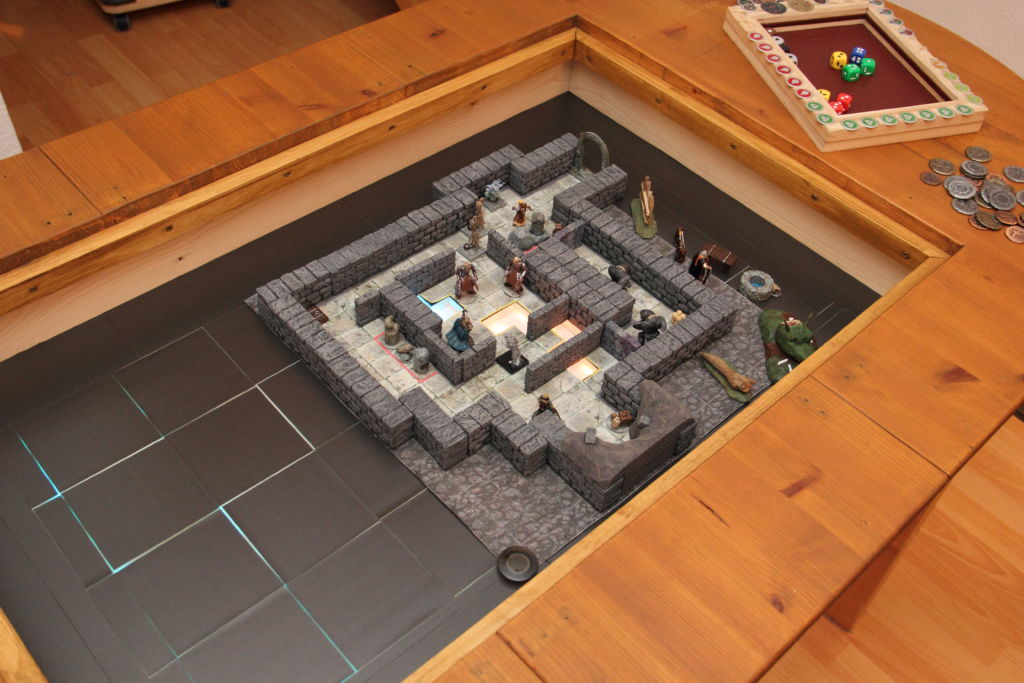
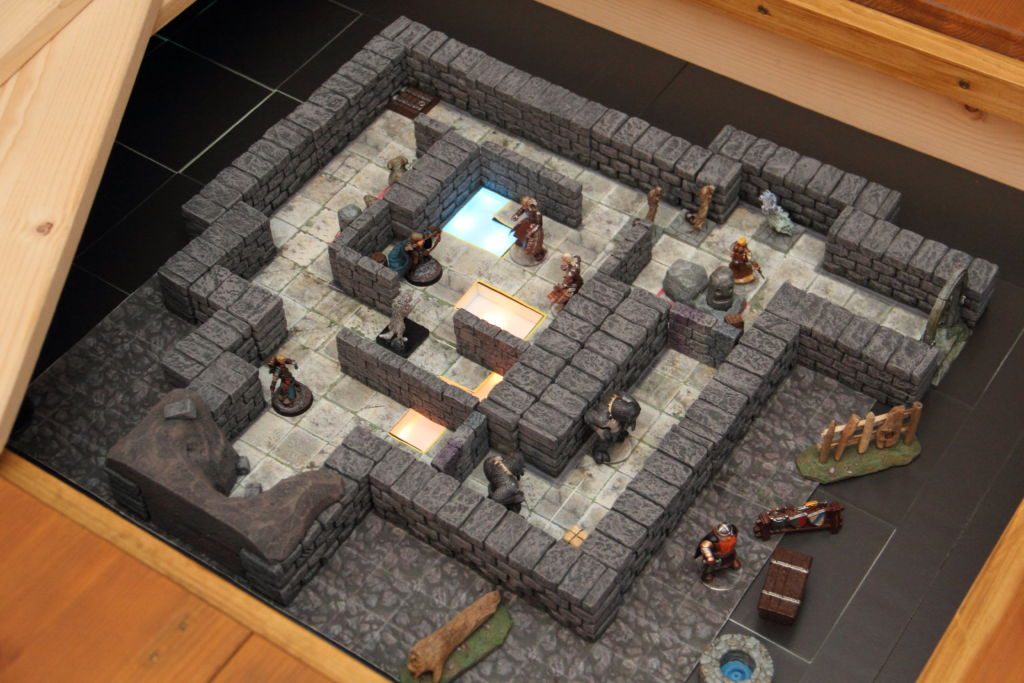
Over the three years, gaming has always been shaped by further development. In this case, not only the characters in the game are meant. The game itself, the handling, the optics, the accessories and much more. So I got the idea to build a gaming table, adapted to our special requirement profile for our Descent game round. The result should improve the gaming experience. The approach was initially to build walls that demarcate the respective playing field and give a more „realistic“ impression. Special features in the area, in particular depressions for water, lava and “poisonous broth”, should come into their own. Special rules apply to these fields. They should be easily recognizable.
The aim of this game is to:
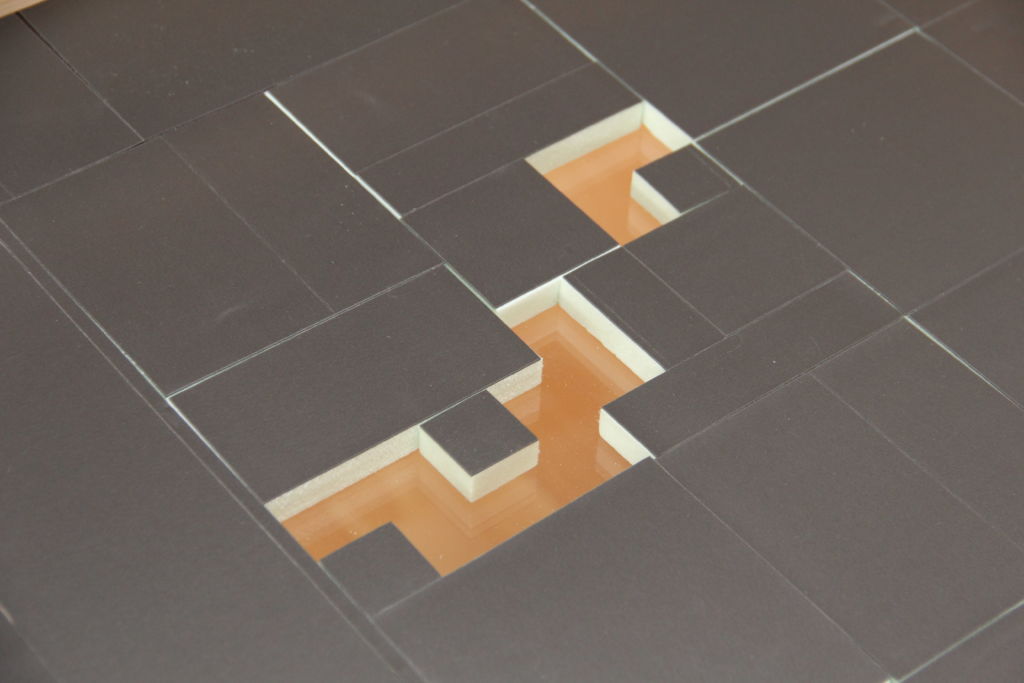
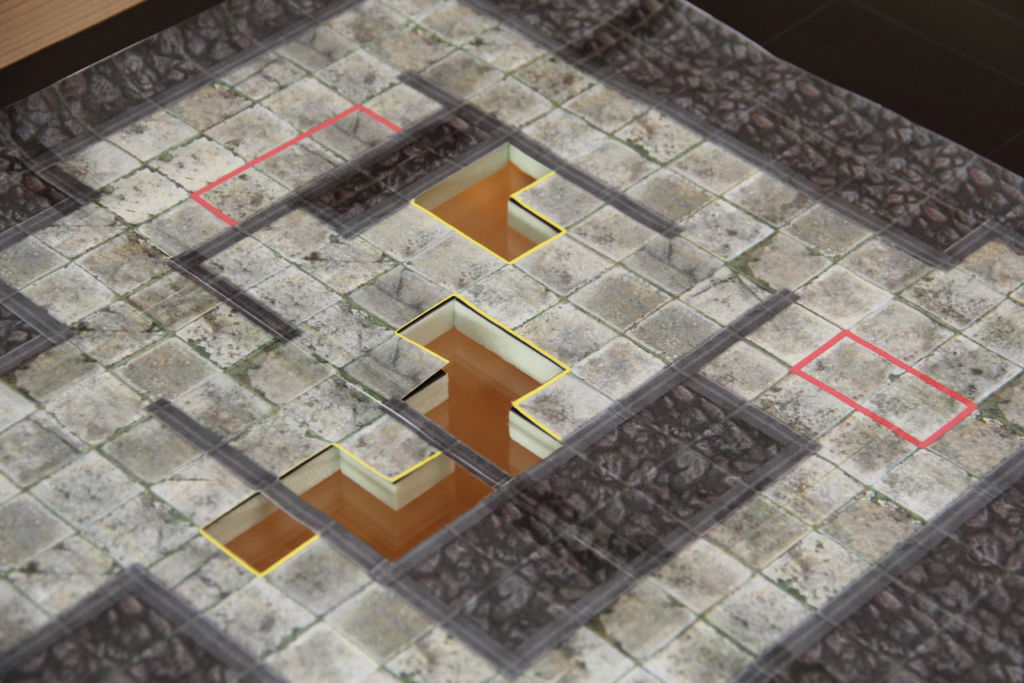
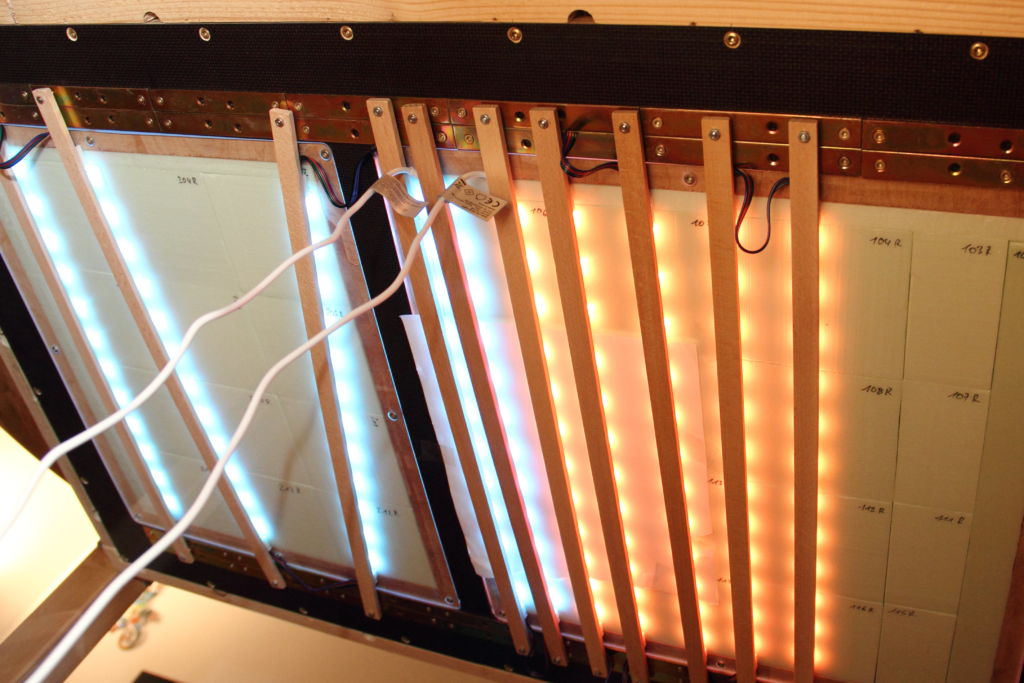
The gaming table should make it possible to visualize “depth effects” for water, lava and “poisonous broth”. “Levels” must be created for normal ground and for the lower terrain.
The depth effects for water, lava and “poisonous broth” should be optically upgraded. These should also be illuminated.
The walls, which will later serve as barricades, not only have to look good. These should also be exactly in the correct size ratio and hold this position. Just imagine it is the turn of the fictional hero “Magnetus” to bend over the gaming table so that he can see all the fields on the game board – including those behind the plastic walls. He assesses the situation. This turns out to be hopeless and dangerous. He overturns the wall or drives it crazy. An obligatory break for repairs must be made.
Table-top game table with magnetic dungeon fixation and flexible, partial background lighting
The basis is an old coffee table
- Saw a hole of the desired size in the table
- Create the base frame for the substructure box
- Insert bottom for box
- Saw holes in the floor for plexiglass inserts
- Refurbish the table surface

Briefly to the walls:
- The basis is rigid foam material from the hardware store
- Creation of 900 stones by cutting with a hot wire cutter and structuring with aluminum foil dumplings
- Gluing stone walls in the desired grid dimensions
- Prime, drybrush twice and „wash“ the walls for the colored design
In detail about the magnet applications on the table-top game table:
Box bottom:
Product used: Iron foil, ferrous foil, self-adhesive, magnetic, width 615 mm, rolled goods
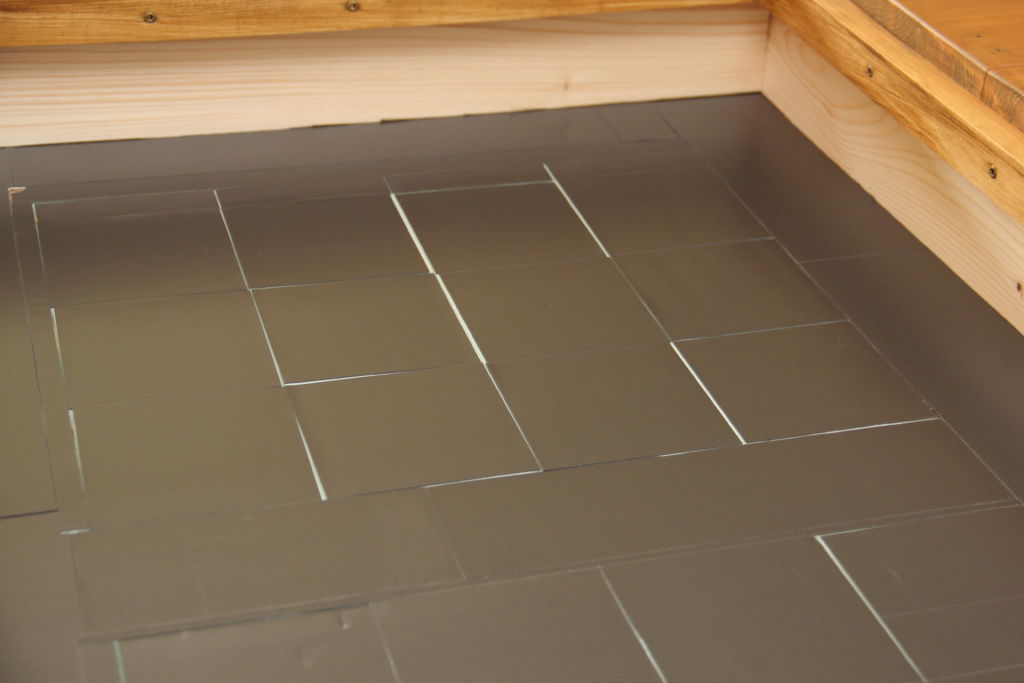
- After completion of the table, the floor in the box was completely covered with iron foil.
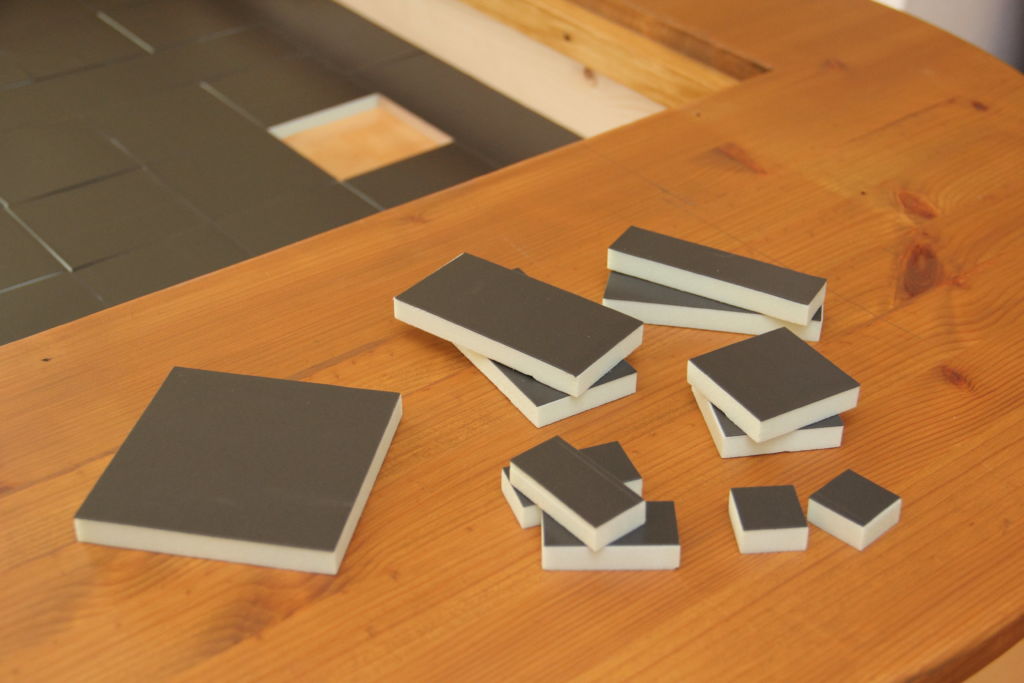
- So that the depth effects can be partially and flexibly displayed differently for each scenario, “puzzle inserts” made of hard foam were created in the area of the Plexiglas inserts in the grid dimensions of the real playing fields.
- Cover the puzzle inserts with iron foil. The rigid foam including the iron foil should apply a specific amount of height to the plexiglass. The top edge of the table floor should be the same height as the puzzle inserts.
- A printed game board can now be laid flat on the surface.

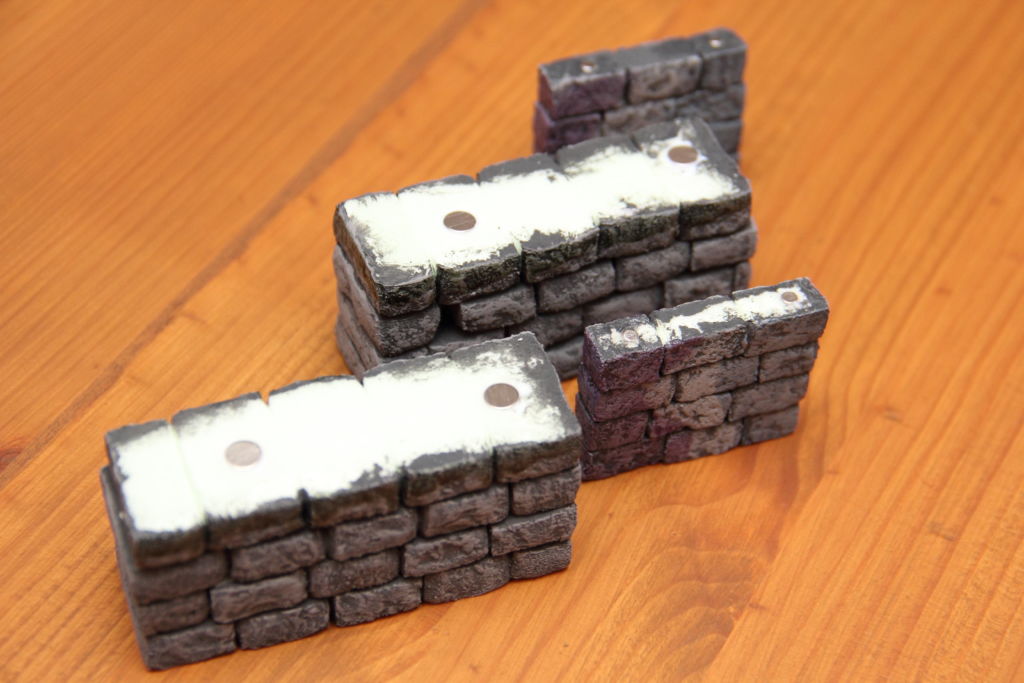
Walls:
Products used: Rod magnets Ø 3.0 x 5.0 mm N42 nickel – holds 350 g and disc magnets Ø 6.0 x 2.0 mm N45 nickel – holds 700 g
- Blind holes were created in the underside of the finished walls.
- Shish kebab skewer (3mm diameter) or a drill (6mm).
- Fill these holes with wood glue
- Push the magnets into the holes until they are flush with the floor.
- The excess wood glue that had oozed out was simply removed with a kitchen roll.
Illumination of the underground:
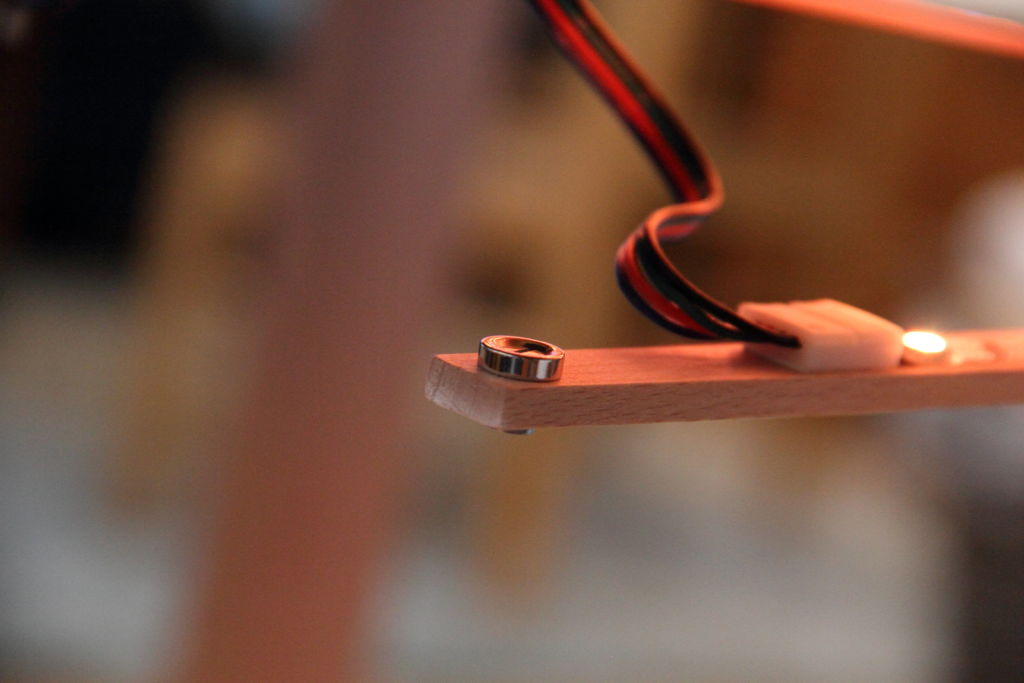
Product used: Ring magnet Ø 10.0 x 3.4 x 3.0 mm N42 nickel with counterbore N-pole
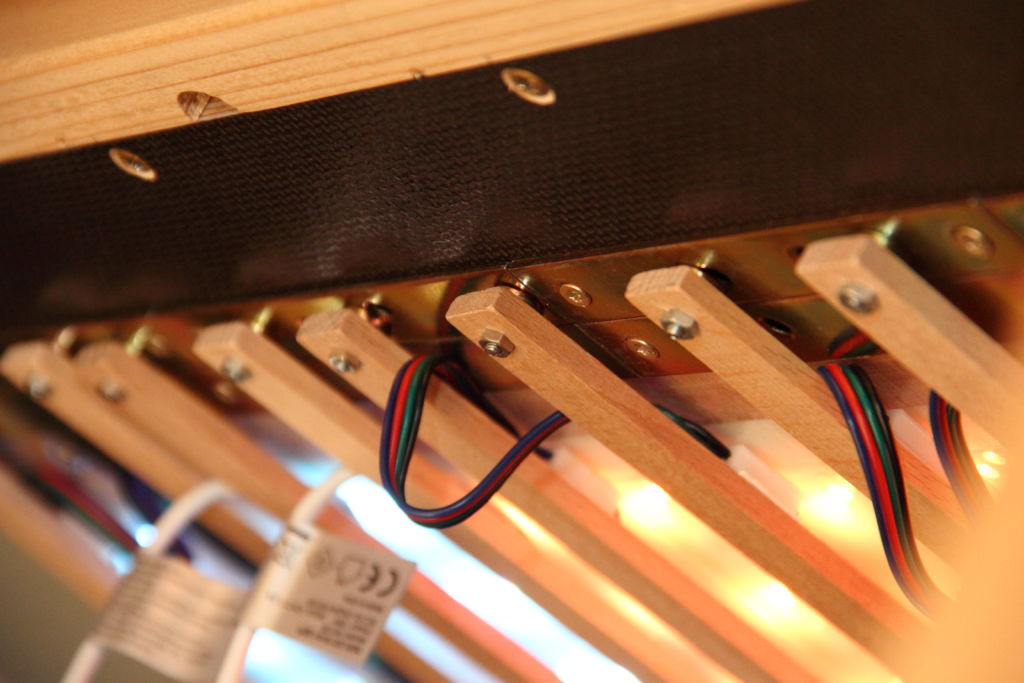
- Flat connectors were mounted in a row on the underside of the bottom of the box, which serve as a magnetic holder for the flexibly positionable LED strips.
- Beech strips are cut to the required length for the strips.
- Cut the LED strip to the required length and number.
- Now glue these parts to the bar and connect them again electrically.
- The magnets are mounted at the ends of the strips.

Helpful tips for processing the magnetic products:
Iron foil:
The pieces of iron foil were heated with a conventional hair dryer in order to take the tension out of the foil, which might have been caused by the curling. At the same time, the aim was to improve the adhesion of the film. This was reinforced by firmly pressing the film. There should be no air bubbles under the film.
Magnets:
The magnets were glued with conventional wood glue. Let the glue harden completely. The function of the glued-in magnets can now be tested. The magnets could stick to the iron foil and pull out of the wall.
An amazing and unique project!