A unique and homemade accessory: The perfect wedding pin with magnets
The perfect wedding pin with magnets
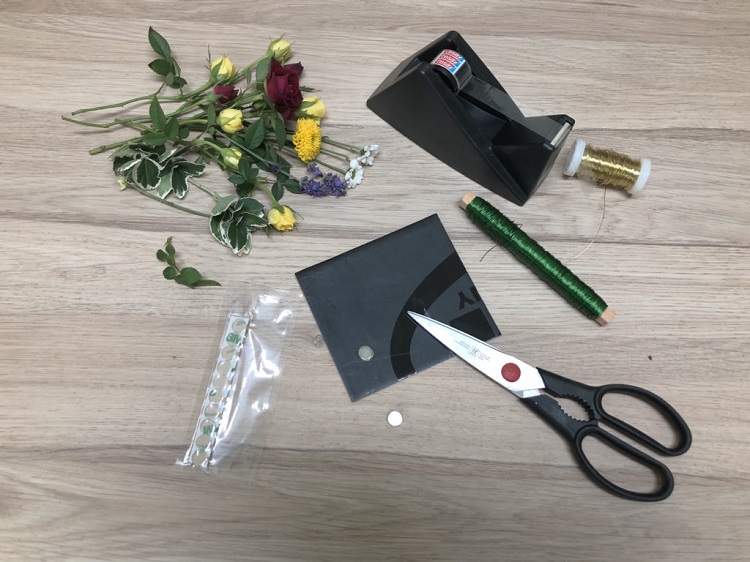
Which material you need for this:
- Discmagnet Ø 15.0 x 3.0 mm N45 nickel – self-adhesive
- Cardboard (preferably a dark color)
- Blossoms
- Winding wire
- Duct tape
Which tools are needed?
- Scissors

Step 1 – Cardboard sub-floor
First you draw a base on the cardboard, as in the photo. The exact shape and size are not important here. But you can orientate yourself about four centimeters. This sub-floor will later be used to attach the flowers.
Tip: If you are planning a lot of badges, it is worthwhile to create a template first. This makes things quicker and guarantees that all badges are the same shape.
Then you can cut out the shapes. By the way, it doesn’t matter what color the box is. However, we recommend dark cardboard boxes as most wedding guests will certainly wear a black or blue suit. So it is the least noticeable.

Then the magnet is glued on. To be on the safe side, the magnet is also fixed with adhesive tape. You do the same with the counterpart (see photo). To do this, cut out a small square from cardboard (approx. 1.5 cm x 1.5 cm) and attach magnets and adhesive tape to it.
Step 2 – Tie flowers

Now it’s up to the flowers: The best thing to do is to buy a rose bush from the discounter for the flowers. Now you can tie the flowers with leaves or the like as you like. You can let your creativity run free here.
Finished with the flower arrangement? Great, then all you have to do is attach the „mini bouquet“ that you made in step 1 to your holder. Fine winding wire is best suited for this.
That’s it! Now you can attach the magnetic pin to the jacket in no time at all and remove them again!
Important note: The pin must not be worn by people with pacemakers!
